Tools:
Sawhorse (we bought a metal one at home depot)
4 1x6 pine boards (they cut ours at the store for free!)
3 1x4 pine boards
Wood Screws and small screws
1" metal braces and washers
Brown Stain
Teal Paint
Sandpaper
Chisel/hammer (to distress)
Rags (for stain)
How to:
After we finally left the home depot, we brought everything home and had to sit for a few minutes. Home Depot is exhausting!
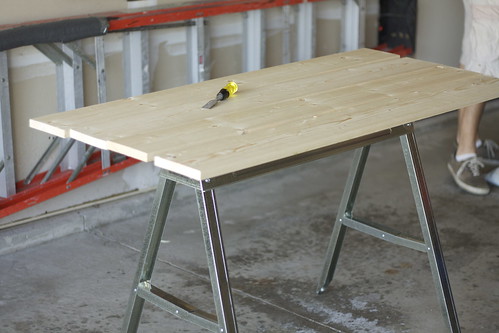
First, my husband made a "mock-up" He is convinced you have to do this before every project...I am not convinced.

This is our mock-up.
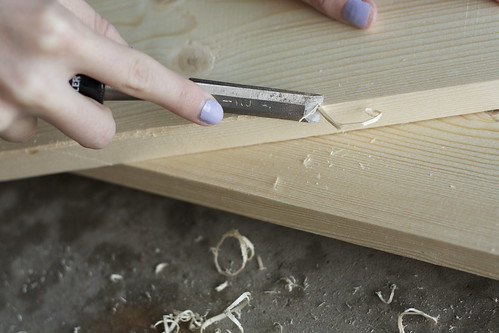
Then we got started on the boards. We hammered, chiseled and sanded the boards down to create a distressed look.
Next we applied the brown stain using rags and let them dry.
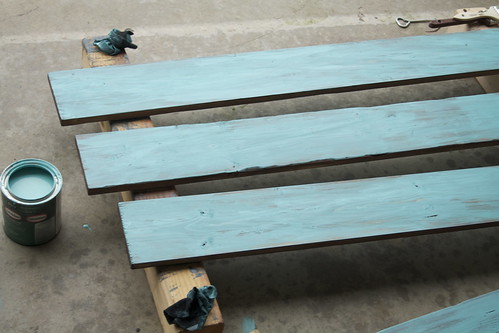
In the meantime, we painted the 3 small boards teal - we didn't stain them brown because they are just going underneath the desk for support and you can't really see them.
After the four larger boards dried, we applied the teal paint in a thin coat with rags to get an uneven look. We wanted it to look like the teal paint was chipping off, so we left some spots more brown then others.
After everything dried, we pieced together all of the wood.
We started by attaching the 3 cross braces (small boards) to the sawhorse. We used wood screws, large washers, and 1 inch metal brackets to attach the 1 x 4's to the sawhorse, we used three boards equally spaced apart with small blocks screwed in between to help with stability. We then drilled 8 holes in each board (4 per side). To attach the top boards we laid the desk boards out and lined them up, and then flipped the sawhorse upside down and screwed the support boards into the "tabletop." After we were finished we tested it out and added a few more screws on the underside of the sawhorse, but it was still a little wobbly, so we drilled into the metal and through one side of each leg and attached small bolts with washers and nuts to make it more sturdy. (this sounds more complicated than it is!) Basically, you screw it all together.
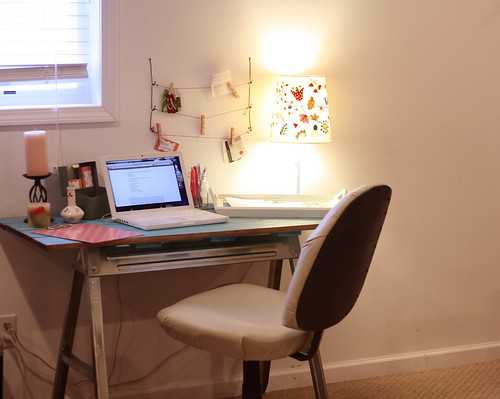
Here is my desk with all my pretty things on it:
I'm really happy with how it turned out! It's still girlie but has a bit of an industrial feel to it.


10 comments:
how cute is this!! good work :) i love the legs and the industrial feel.
xo, amanda
http://mamawatters.blogspot.com
Love this - ingenious!
Very cool DIY! Love the color you chose!
xx
Giovanna
www.oliveandanarrow.com
This is awesome! Absolutely adorable. xo
http://katiealexandraa.blogspot.ca/
what?! so cute! I totally might steal this idea. how much was that sawhorse? this seems like a pretty inexpensive project with an adorable outcome. good work!
What a great DIY, it turned out awesome! xo
http://dreamingenfrancais.blogspot.com/
This table is amazing, and I had to point out that we're wearing the same nail polish color :]
Just discovered your cute blog btw.
molly
http://alwaysamrsforeverakidd.blogspot.com
This is amazing! Great share.
http://thecharleygirl.com
xo
Really great idea! The finished product is lovely :)
http://nestofamagpie.blogspot.com/
Love this! It is perfect!
http://lizzieroe.blogspot.com
Post a Comment